

How To Replace Clutch Master Cylinder Toyota Corolla
If your Toyota Corolla’s clutch feels soft or you notice fluid leaks, it might be time to replace the clutch master cylinder. This part plays a key role in making sure your clutch works smoothly every time you press the pedal.
Fixing it yourself can save you money and give you confidence in handling basic car repairs. In this guide, you’ll find simple, step-by-step instructions to replace your clutch master cylinder quickly and safely. Keep reading—you’re just a few easy steps away from getting your Corolla back on the road with a clutch that feels like new.
Signs Of A Faulty Clutch Master Cylinder
The clutch master cylinder is a key part of your Toyota Corolla’s clutch system. It helps move the clutch pedal and control the clutch’s action. Signs of a faulty clutch master cylinder often show up before a full failure. Recognizing these signs early can save time and money on repairs. Knowing what to watch for helps you maintain safe and smooth driving.
Common Symptoms
A soft or spongy clutch pedal often means trouble. The pedal may sink to the floor without resistance. Difficulty shifting gears or grinding noises can also appear. Sometimes the clutch pedal feels sticky or hard to press. These symptoms suggest the clutch master cylinder may be failing.
Diagnosing Leaks
Leaks are a clear sign of a problem. Check for fluid under the dashboard or near the clutch pedal. Look for wet spots or stains around the master cylinder itself. Low brake fluid levels in the reservoir can also indicate a leak. Any visible fluid is a strong clue the master cylinder needs attention.
Impact On Clutch Performance
A bad clutch master cylinder affects clutch control. You may notice slipping or delayed clutch engagement. The car might stall or jerk during gear changes. Poor clutch performance reduces driving comfort and safety. Fixing the master cylinder restores smooth clutch operation and prevents further damage.

Credit: www.reddit.com
Tools And Materials Needed
Replacing the clutch master cylinder on a Toyota Corolla requires specific tools and materials. Having everything ready makes the job easier and faster. This section lists all the essentials needed for a smooth repair process.
Essential Tools
- Socket wrench set for bolts and nuts
- Line wrench for hydraulic fittings
- Screwdrivers (flathead and Phillips)
- Pliers for hose clamps
- Brake fluid syringe or turkey baster
- Drain pan to catch leaking fluid
- Rags or shop towels for cleanup
Replacement Parts
- New clutch master cylinder specific to Toyota Corolla
- Replacement hydraulic fluid (DOT 3 or DOT 4)
- New clutch slave cylinder (optional but recommended)
- Seals or gaskets if not included with the new cylinder
Safety Equipment
- Safety glasses to protect your eyes
- Mechanic gloves to keep hands clean
- Jack stands to secure the car safely
- Wheel chocks to prevent rolling
- Work light for better visibility
Preparing Your Toyota Corolla
Preparing your Toyota Corolla is the first step to replace the clutch master cylinder. Proper preparation ensures safety and smooth work. Take your time to set up the car and workspace correctly. This section guides you through the essential steps before starting the replacement.
Park And Secure Vehicle
Find a flat surface to park your Toyota Corolla. Engage the parking brake to prevent movement. Turn off the engine and remove the keys. Place wheel chocks behind the rear wheels for extra safety. This stops the car from rolling while you work.
Locate The Clutch Master Cylinder
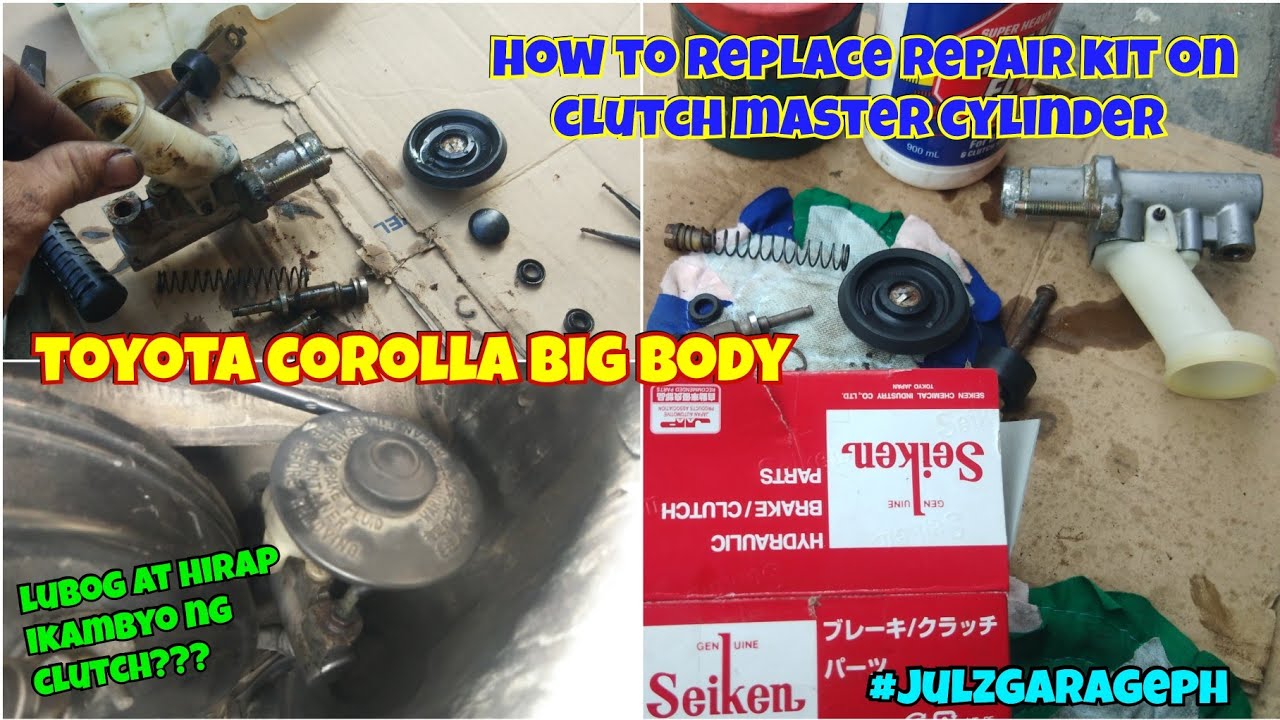
Open the hood of your Corolla carefully. Look near the brake master cylinder on the driver’s side. The clutch master cylinder is a small cylinder with a reservoir attached. Identifying it clearly helps avoid confusion during removal and replacement.
Remove Obstructions
Clear any parts blocking access to the clutch master cylinder. This may include removing the air intake or battery cover. Use simple tools like a screwdriver or wrench. Keeping the area clean and clear makes the replacement easier and faster.
Credit: www.youtube.com
Removing The Old Clutch Master Cylinder
Removing the old clutch master cylinder is a key step in replacing it. This process needs care to avoid damaging parts. First, you will disconnect the hydraulic lines. Then, you remove the mounting bolts. Finally, you extract the cylinder from its place. Following these steps helps prepare for the new installation.
Disconnecting Hydraulic Lines
Start by locating the hydraulic lines connected to the master cylinder. Use a wrench to loosen the fittings gently. Avoid spilling brake fluid, as it can harm paint and parts. Place a container below to catch any drips. Carefully pull the lines free once they are loose. Set the lines aside to prevent damage.
Removing Mounting Bolts
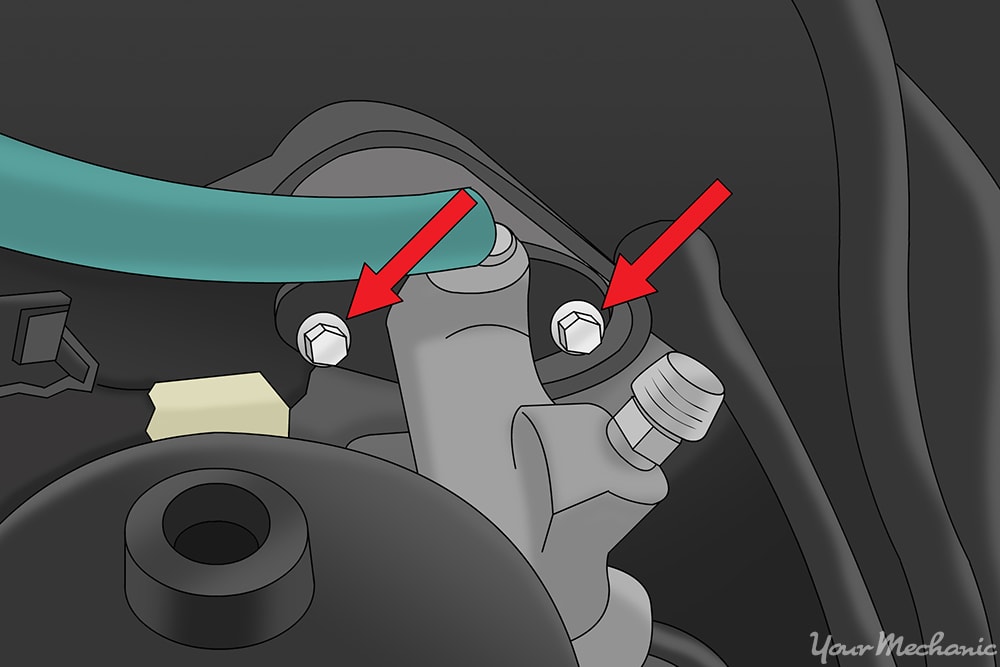
Next, find the bolts holding the clutch master cylinder to the firewall. Use the correct size socket or wrench to remove them. Turn the bolts counterclockwise until they come out completely. Keep the bolts safe for reuse or replacement. Removing these bolts frees the cylinder from its mount.
Extracting The Cylinder
After bolts and lines are off, gently pull the cylinder away from the firewall. Wiggle it slightly if it feels stuck. Check for any remaining clips or connections and remove them. Once free, place the old cylinder aside. This clears the way for the new clutch master cylinder.
Installing The New Clutch Master Cylinder
Installing the new clutch master cylinder on your Toyota Corolla is a crucial step. It restores smooth clutch operation and improves driving safety. Take your time to place the parts correctly and connect everything securely. Follow these steps carefully for a proper installation.
Positioning And Securing
Place the new clutch master cylinder in the original mounting spot. Align it with the bolt holes on the firewall. Insert the mounting bolts and tighten them evenly. Avoid over-tightening to prevent damage. Make sure the cylinder sits firmly and does not move.
Reconnecting Hydraulic Lines
Attach the hydraulic lines to the new master cylinder. Hand-tighten the fittings first to avoid cross-threading. Use a wrench to secure the connections, but do not overtighten. Check that the lines are not bent or pinched. Proper connection prevents fluid leaks and keeps pressure steady.
Checking For Proper Fit
Inspect the master cylinder and connected parts visually. Ensure all bolts and fittings are tight and secure. Press the clutch pedal slowly to test the movement. The pedal should feel smooth and firm. Any unusual resistance or softness means adjustments are needed.
Bleeding The Clutch System
Bleeding the clutch system is a key step after replacing the clutch master cylinder on a Toyota Corolla. This process removes air trapped inside the hydraulic lines. Air in the system can cause the clutch pedal to feel soft or spongy. Proper bleeding ensures smooth clutch operation and better control while driving.
Why Bleeding Is Necessary
Air bubbles reduce hydraulic pressure in the clutch system. This makes the pedal hard to press or uneven. Bleeding pushes air out and fills the system with fluid. Without bleeding, the clutch may not disengage properly. This can lead to poor shifting and damage over time.
Step-by-step Bleeding Process
First, fill the master cylinder reservoir with fresh brake fluid. Find the bleed nipple on the slave cylinder. Attach a clear tube to the nipple and place the other end in a container. Ask a helper to slowly press the clutch pedal several times, then hold it down.
Open the bleed nipple slightly to release fluid and air. Watch for bubbles in the tube. Close the nipple before the pedal is released. Repeat this until no bubbles appear. Keep checking fluid level in the reservoir to avoid air intake.
Ensuring No Air Remains
After bleeding, press the clutch pedal multiple times. The pedal should feel firm and consistent. Check for any leaks around the master and slave cylinders. If the pedal still feels soft, repeat the bleeding steps. Confirm the fluid level is correct before driving.
Testing The New Installation
Testing the new installation of the clutch master cylinder is important. It ensures the repair works well and keeps you safe on the road. This stage confirms the clutch system works smoothly before you drive extensively. Follow these steps to check your work and avoid future issues.
Checking Clutch Pedal Feel
Press the clutch pedal gently. It should feel smooth and firm. If the pedal feels soft or spongy, air may be in the system. Press the pedal several times to help remove air bubbles. The pedal should return quickly to its normal position. A good pedal feel means the master cylinder works correctly.
Inspecting For Leaks
Look under the hood and near the clutch pedal. Check for any fluid leaks around the master cylinder and lines. Fluid leaks lower hydraulic pressure and cause clutch problems. Use a clean cloth to wipe off any spills. Recheck the area after pressing the pedal several times. No leaks mean the installation is tight and secure.
Test Driving Tips
Start the car and drive slowly in a safe area. Shift through all gears to test clutch engagement. The gears should change smoothly without grinding. Pay attention to the pedal’s response during gear changes. Stop and start a few times to check clutch control. If the clutch feels normal, the installation is successful.
Troubleshooting Common Issues
Troubleshooting common issues with the clutch master cylinder on your Toyota Corolla helps keep your car running smoothly. Knowing what signs to watch for can save time and money. This guide explains typical problems and offers simple tips for checking them.
Persistent Pedal Problems
The clutch pedal may feel soft or sink to the floor. This often means air is in the hydraulic line. Sometimes the pedal stays hard and won’t release the clutch fully. This can signal a worn master cylinder or a stuck slave cylinder. Check the pedal feel before and after pressing. Notice any changes or unusual resistance.
Hydraulic Fluid Concerns
Low or dirty hydraulic fluid can cause clutch issues. Look for leaks near the master cylinder or under the car. Fluid should be clear and at the right level in the reservoir. Dark or thick fluid means it needs replacing. Air bubbles in the fluid also reduce clutch performance. Regular fluid checks help avoid bigger problems.
When To Seek Professional Help
Some clutch problems need expert attention. If bleeding the system does not fix pedal issues, a mechanic should inspect the parts. Strange noises or difficulty shifting gears may mean internal damage. Don’t delay repairs if the clutch feels very different or the car won’t move smoothly. Safety is key.
Credit: www.yourmechanic.com
Frequently Asked Questions
How Do I Know If My Clutch Master Cylinder Is Bad?
Signs include a soft or spongy clutch pedal, difficulty shifting gears, or fluid leaks near the master cylinder. These symptoms indicate the clutch master cylinder may need replacement to restore proper clutch function.
What Tools Are Needed To Replace The Clutch Master Cylinder?
You will need a wrench set, screwdriver, brake fluid, a drain pan, and possibly a line wrench. Having these tools ready makes the replacement process smoother and faster.
How Long Does It Take To Replace The Clutch Master Cylinder?
Replacing the clutch master cylinder typically takes 1 to 2 hours for most DIYers. Time may vary based on experience and access to the parts.
Can I Replace The Clutch Master Cylinder Myself Safely?
Yes, with basic mechanical knowledge and proper tools, you can replace it safely. Follow instructions carefully and work in a well-ventilated area to avoid brake fluid exposure.
Conclusion
Replacing the clutch master cylinder on a Toyota Corolla is not hard. Follow each step with care and take your time. Use the right tools and parts for safety. Check for leaks and proper pedal feel after finishing. Regular maintenance helps your car run smoothly.
You can save money by doing this yourself. Keep your Corolla driving well and enjoy the ride. Simple fixes like this make a big difference.


