How to Fix a Bad Starter
To fix a bad starter, first identify symptoms like clicking sounds or a non-starting engine, then inspect and replace if necessary. Begin by testing the battery and connections before moving on to the starter motor itself.
A vehicle’s starter is integral to the ignition process, engaging the engine when you turn the key or push the start button. Signs of a faulty starter may include dimming interior lights, unusual noises, or the engine not turning over at all.
Tackling a bad starter involves several steps, starting with ensuring your car’s battery is fully charged and in good health. Proper maintenance of electrical connections also plays a crucial role in starter functionality. Repairing a bad starter might require cleaning contacts or replacing the entire motor, depending on the severity of the issue. Remember, safety is paramount; disconnect the battery before attempting any fixes to avoid electric shocks. Engage with a professional mechanic for complex problems, ensuring your vehicle returns to optimal performance rapidly.
Signs Of A Faulty Starter
Imagine this: You’re running late, hop into your car, and turn the key, but nothing happens. It could well be a bad starter. This critical part of your car is the main cog in the engine’s ignition process. Knowing the signs of a starter in trouble could save the day.
Recognizing The Symptoms
The first step to fixing a bad starter is to identify what’s off. Look for these red flags:
- No sound on key turn: Silence when expecting your engine to roar is a tell-tale sign.
- Freewheeling: A whining noise when you start your car indicates the starter gear isn’t engaging.
- Smoke: Seeing smoke is a serious symptom and means immediate attention is needed.
- Starter stays on: If the starter doesn’t disengage after the engine has started, it’s bad news.
Common Starter Issues
Certain problems crop up more often with starters. Check out this list:
| Issue | Symptoms | Possible Causes |
|---|---|---|
| Dead Battery | No lights or sounds when starting. | Old battery, lights were left on. |
| Faulty Wiring | Intermittent starting problems. | Corroded connections, damaged cables. |
| Broken Solenoid | Clicking sound, no engine start. | Wear and tear, faulty part. |
By recognizing these issues early, repairs can be much simpler. A starter that’s struggling will eventually fail. Don’t wait until it’s too late; assess the condition as soon as symptoms arise and get it fixed.
Safety Precautions
Before you dive into fixing a bad starter, safety comes first. It’s important to take the right steps to protect yourself and your vehicle. Let’s talk about the essential safety measures you need to keep in mind.
Preparing For Repairs
- Disconnect the battery: This prevents electric shocks.
- Gather the right tools: Make sure you have everything before you start.
- Work in a well-lit area: Good visibility helps avoid mistakes.
Protective Measures
Personal safety is key when working on your car. Below are steps to keep you safe.
| Measure | Description |
|---|---|
| Wear gloves | They protect your hands from sharp objects and dirt. |
| Use safety glasses | These shield your eyes from harmful debris. |
| Avoid loose clothing | It can get caught in moving parts. |
Always check the car is stable before you start. Use wheel chocks to secure it.
Diagnostics
Encountering issues with your vehicle’s starter can be frustrating. Diagnosing the problem is the first step towards a fix. A proper diagnosis ensures you don’t waste time or money on unnecessary repairs. Let’s dive into how to test your starter and inspect the electrical system.
Testing The Starter
Identifying a faulty starter is straightforward with the right approach. Use these steps:
- Prepare your vehicle: Ensure it’s in park (or neutral for manual transmissions) and that the emergency brake is set.
- Check the battery: A dead battery mimics a bad starter. Confirm the battery has a full charge and clean terminals.
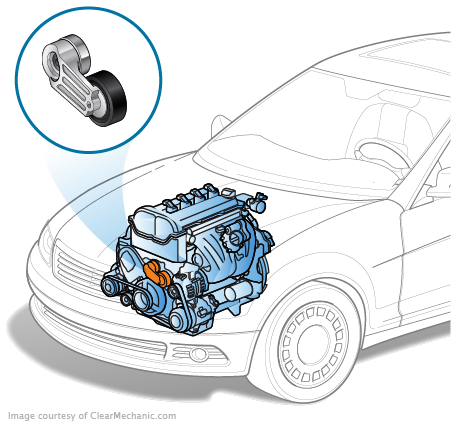
- Locate the starter: Find the starter under the hood, usually on the engine’s side.
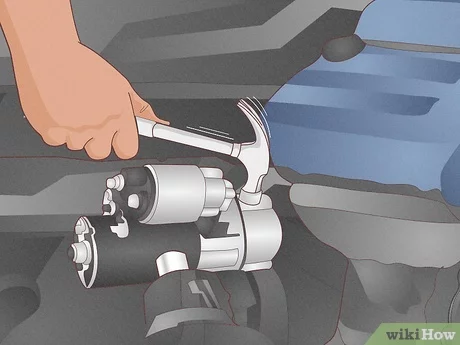
- Tap the starter: Gently tap the starter with a hammer. A gentle tap can sometimes free a jammed gear.
- Bypass the relay: Use a screwdriver to bridge the connection on the solenoid to send current directly to the starter.
- Listen for a click: A clicking sound without the engine turning over often indicates a bad starter.
- Test with a multimeter: Confirm that the starter receives power using a multimeter.
If these steps point to a starter issue, consider professional help or replacement.
Electrical System Inspection
A thorough electrical system check can uncover hidden issues. Focus on these areas:
- Battery voltage: Use a multimeter to check for at least 12.6 volts at the battery.
- Starter connections: Ensure all starter connections are tight and corrosion-free.
- Ignition switch: Test for continuity at the ignition switch to confirm it works as intended.
- Fuses and relays: Examine all related fuses and relays for damage or wear.
Spot issues in the electrical system promptly to avoid misdiagnosing a bad starter.
Credit: m.youtube.com
Starter Removal
Fixing a bad starter begins with its proper removal. Follow the step-by-step guide below. This ensures a safe and efficient process. Remember to be methodical and patient.
Disconnecting The Battery
Before touching the starter, the battery must be detached. Always start with the negative terminal. Use a wrench to loosen the terminal nut. Then, carefully remove the terminal from the battery post. Wrap it with insulation to prevent accidental contact. Repeat the process for the positive terminal. Ensure all electrical power is disconnected.
Accessing The Starter Motor
Locating the starter motor is the next crucial step. It is usually found at the lower part of the engine. Make enough room to work comfortably. Remove any components blocking the starter. Keep track of each removed part. Now, visualize the starter mounting.
- Check for electrical connections on the starter.
- Label each wire before removal to avoid confusion later.
- Use appropriate tools to detach the wires.
- Unscrew the mounting bolts securing the starter.
Once all connections are free, carefully take out the starter. Place it on a clean surface. Inspect the area for any potential issues.
Proceeding with caution and organization is important in fixing a bad starter. Precise steps prevent further damage. Stay tuned for the installation guide.
Troubleshooting And Repairing
A bad starter can mean a car that won’t start, leaving you stranded. Identify and fix starter issues with the right steps. It’s essential to know what to do. Let’s dive into troubleshooting and repairing the starter, focusing on two key areas.
Solenoid Replacement
The solenoid acts as a bridge for electric current. It could be why your car isn’t starting. Follow these steps for replacing the solenoid:
- Disconnect the battery to avoid shocks.
- Locate the starter solenoid.
- Remove the solenoid from the starter motor.
- Install the new solenoid.
- Reconnect the battery.
- Test the starter.
Cleaning And Lubrication
Dirt and grime can hinder starter operation. Follow these cleaning steps:
- Remove the starter from the vehicle.
- Use a quality cleaner to remove gunk from the starter.
- Apply lubricant to the moving parts.
- Re-install the starter and test its performance.
Credit: www.southdenverauto.com
Reassembling And Testing
With a fixed starter, it’s time to put things back together. Careful reassembly ensures a smooth start. Let’s walk through how to reinstall the starter and test it post-repair.
Reinstalling The Starter
Fit the starter back into its original position. Use new bolts if the old ones are worn. Tighten each bolt evenly to avoid misalignment.
- Connect the electrical wires to the starter. Make sure connections are secure.
- Reattach the battery terminal to restore power.
- Ensure the starter gear meshes well with the engine’s flywheel.
Post-repair Testing
Double-check all connections before testing. This step is crucial for safety and function. Perform a test start to ensure the starter engages properly.
- Turn the key to the ignition position.
- Listen for a smooth cranking sound.
- Observe if the engine starts promptly.
If the engine doesn’t start, recheck your work. Ensure all parts are properly installed and connections are tight. A successful fix leads to a quiet, quick start and extended starter life.
When To Seek Professional Help
Recognizing the limit of DIY solutions is crucial for car repair success. Especially with car starters, certain issues need a professional eye. Knowing when to seek professional help can save both time and money, and ensure your car is handled properly. Below we’ll explore situations where expert intervention is the best course of action.
Complex Electrical Problems
Starters are part of an intricate electrical system. The signs of failure might include a car that won’t start, a clicking noise, or dim lights.
DIY efforts can quickly turn risky if you’re unfamiliar with your car’s electrical infrastructure. For these reasons:
- Specialized tools may be required that are not commonly available.
- Diagnostic equipment helps pinpoint electrical faults accurately.
- Wiring diagrams are often complex and essential for precise repairs.
Seek a certified mechanic if facing any of these hurdles.
Benefits Of Professional Services
Outsourcing to professionals serves multiple benefits:
| Advantage | Explanation |
|---|---|
| Expertise | Mechanics possess the know-how for efficient troubleshooting and repair. |
| Time-Saving | Experts swiftly address the problem, minimizing car downtime. |
| Warranty | Many services include a warranty, offering peace of mind post-repair. |
| Safety | Professional handling mitigates the risk of electrical hazards. |
An expert can also assess if a starter replacement or repair suffices.

Credit: www.wikihow.com
Frequently Asked Questions Of How To Fix A Bad Starter
Can A Bad Starter Be Repaired?
Yes, a bad starter can often be repaired if the damage is not too severe. Components like solenoids, gears, and brushes may be replaceable. However, if the starter is significantly damaged, replacement might be a more cost-effective solution.
What Causes A Starter To Fail?
Starters can fail due to electrical issues, mechanical wear, or overheating. Common causes include faulty solenoids, worn-out brushes or gears, and corroded connections. Regular wear over time is also a typical reason for starter failure.
How To Diagnose A Starter Problem?
To diagnose a starter problem, check for a clicking sound when turning the key, dimming lights, and trying to start the engine multiple times. A professional mechanic can perform tests on the battery, starter solenoid, and the starter motor itself to pinpoint the issue.
What Are The Symptoms Of A Bad Starter?
Symptoms of a bad starter include a clicking noise when turning the key, the engine not turning over, intermittent starting issues, and sometimes the starter motor running but not engaging. The car may also start unpredictably or not at all.
Conclusion
Tackling a faulty starter can be daunting, but it’s manageable with the right approach. Remember to diagnose correctly, gather your tools, and follow safety protocols. Our guide aimed to simplify this process, ensuring you get your vehicle running smoothly again.
For persistent issues, consult a professional. Drive safely, and attend to repairs promptly for optimal vehicle performance.