How Long Does It Take to Fix a Vacuum Leak in a Car
Fixing a vacuum leak in a car can typically take between 1 to 4 hours. The exact time depends on the leak’s severity and accessibility.
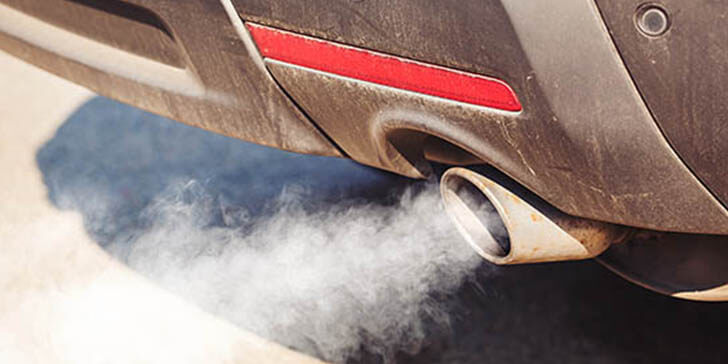
Vacuum leaks in a car’s engine can cause significant performance issues. Addressing them promptly is crucial for maintaining your vehicle’s health and efficiency. A vacuum leak stems from cracks or disconnections in the vacuum hoses or gaskets, which lead to improper air-fuel mixtures and engine misfires.
Mechanics use a specialized smoke machine and other diagnostic tools to pinpoint the source of the leak before proceeding with the repair. The time taken to fix the issue is highly variable, considering factors such as the complexity of locating the leak and the repair’s intricacy, which might involve simple hose replacement or more extensive part refurbishments. Keeping the repair time within a few hours relies on the expertise of the mechanic and the immediate availability of necessary parts. Regular maintenance checks can help identify and address such leaks before they escalate, saving time and money on prolonged repairs.
Identifying A Vacuum Leak
Car troubles can spring from many places. A common, often overlooked source is a vacuum leak. These leaks happen in the vacuum hoses of your engine. They can lead to bigger issues if not found early. Let’s dive into the signs and tools you need to spot a vacuum leak.
Common Symptoms
Common Symptoms
Listening for odd sounds is a first step. Whistling or hissing from the engine means a check is due. Here’s a quick list of signs to look for:
- Rough idling – The engine sounds rougher than usual.
- High idle RPMs – The revolutions per minute spike up.
- Stalling engine – The car might stop unexpectedly.
- Poor acceleration – The car feels sluggish when speeding up.
Diagnostic Tools
Diagnostic Tools
Checking for a vacuum leak requires specific tools. Methods can range from simple to technical. Here are common tools:
| Tool | Use |
|---|---|
| Vacuum Gauge | Measures vacuum levels |
| Smoke Machine | Pushes smoke through hoses to find leaks |
| Soapy Water | Creates bubbles at the leak site |
For accuracy, combine these tools with a professional inspection. Mechanics use advanced tools to detect and measure vacuum pressure precisely.
Factors Influencing Repair Time
Understanding the time it takes to fix a vacuum leak in your car is not straightforward. Various factors affect the repair time. From the leak’s complexity to parts availability and the mechanic’s skill, all play a part. Let’s explore these factors in detail for a clearer picture.
Complexity Of The Leak
The complexity of a vacuum leak directly affects repair time. Simple leaks, often found in accessible areas, may take a few hours to fix. Complex leaks, hidden or intertwined with other engine components, might require a full day’s work. The following points highlight the impact of complexity:
- Location: Hard-to-reach leaks demand more labor.
- Size: Small, elusive leaks require thorough diagnostics.
- Impact: Leaks affecting multiple systems take longer to address.
Availability Of Parts
Repairing a vacuum leak may need replacement parts. The availability of these parts is crucial. Immediate access means a faster fix, while delays can extend repair times. Consider these aspects regarding parts:
| Part Requirement | Availability | Effect on Repair Time |
|---|---|---|
| OEM (Original Equipment Manufacturer) | In Stock | Quick Repair |
| Aftermarket or Special Order | Needs Ordering | Delayed Repair |
Skill Level Of The Technician
The technician’s expertise plays a vital role in fixing a vacuum leak. Experienced mechanics diagnose and solve problems faster than novices. Here are key points to remember:
- An expert technician identifies leaks quickly.
- Repair strategies vary with skill levels.
- Higher skill often leads to shorter repair times.
The Repair Process
The repair process for fixing a vacuum leak in a car varies. It often depends on the complexity and the location of the leak. Let’s delve into the typical steps involved once a mechanic identifies a vacuum leak.
Locating The Leak
Finding the source of a vacuum leak is crucial. It can be tricky. Mechanics use a few methods to pin down the culprit:
- Visual inspection: A straightforward check of vacuum hoses and connections.
- Smoke test: Introduces smoke into the vacuum system to reveal the leak’s location.
- Listening: Hisses or whistling sounds often indicate the leak area.
Sealing Or Replacing Components
After locating the leak, a mechanic will decide on the best fix. Sometimes a sealant can repair minor issues. In other cases, parts need replacement. Here’s what they might do:
- Secure connections: Tighten up any loose components.
- Seal small leaks: Use of a specialized sealant for minor cracks.
- Replace faulty parts: Swap out damaged hoses or fittings.
Quality and care in these steps ensure a long-lasting repair. Completion time can vary from 30 minutes to a few hours. This depends on the leak’s severity and accessibility.

Credit: shop.advanceautoparts.com
Average Repair Duration Estimates
When dealing with car troubles, understanding how long repairs take is crucial. In the case of a vacuum leak, the duration varies. Each car’s condition is unique. This section estimates repair times for vacuum leaks.
Small, Accessible Leaks
Smaller vacuum leaks are usually quicker to fix. Mechanics can often locate them with ease. Here’s what to expect:
- Diagnosis time: 30 minutes to 1 hour.
- Simple repairs: Around 1-2 hours.
Factors like workshop load and parts availability can affect these times. Generally, these are the steps:
- Identify the leak source.
- Replace damaged hoses or gaskets.
- Test to confirm the issue is resolved.
Large, Intricate Leaks
Larger leaks demand more time and effort. They may be hidden or part of complex systems. Expect a longer process:
- Detailed examination: Up to 2 hours.
- Complex repairs: 2-4 hours or more.
Some cases might require special orders for parts which can add to the timeframe. The main steps include:
- Perform an in-depth diagnostic.
- Disassemble necessary components.
- Fix or replace faulty parts.
- Reassemble and verify the repair.
Always consult with a professional for a precise timeline based on your specific situation.
Extending The Life Of Vacuum Hoses
Vacuum hoses are critical to your car’s performance. Keeping them in top shape ensures your engine runs smoothly. Extend the life of these crucial components with proper care and regular checks. Doing so avoids vacuum leaks that can lead to costly repairs.
Regular Maintenance Tips
Consistent upkeep minimizes the risk of vacuum hose deterioration. Follow these simple maintenance tips:
- Inspect hoses during oil changes.
- Clean out debris for clear air flow.
- Ensure clamps are secure and tight.
- Look for cracks or signs of wear frequently.
Quality Replacement Choices
Choosing the right hoses can prevent future leaks. Consider these options:
| Type | Benefits | Lifespan |
|---|---|---|
| Silicone | Heat resistant, durable | Long |
| OEM Parts | Guaranteed fit, reliable | Varies |
| Reinforced | Strong, high pressure tolerance | Moderate to long |
Professional Vs. Diy Repair
Deciding whether to take your car to a professional or tackle a vacuum leak yourself might seem tough. This pivotal choice impacts both repair time and your wallet. It’s crucial to weigh the pros and cons. A savvy car owner considers both paths before diving in.
When To Seek Professional Help
Complex systems demand skilled hands. Here’s when a pro makes sense:
- Unknown leak source: Professionals swiftly locate leaks with specialized tools.
- Warranty coverage: Some repairs are covered, saving you money.
- Safety first: Pros have the right gear to avoid injury.
- Time savings: A pro can fix it fast, getting you back on the road.
Diy Repair Considerations
Contemplating a DIY fix? Assess these factors first:
- Skills and knowledge: Do you know where the leak is and how to fix it?
- Tools: Own a vacuum gauge or sealant? They’re necessary for home repair.
- Time commitment: DIY takes longer, be ready to invest it.
- Risk assessment: Mistakes could mean more damage and costs.
Remember, simple leaks often suit DIY while complex issues benefit from professional expertise.

Credit: www.wikihow.com
Frequently Asked Questions For How Long Does It Take To Fix A Vacuum Leak In A Car
What Is A Vacuum Leak In A Car?
A vacuum leak in a car refers to a breach or unsealed gap in the intake manifold or vacuum hoses. This allows extra air to mix with the fuel-air composition, causing engine performance issues such as rough idling or acceleration problems.
How To Diagnose A Car’s Vacuum Leak?
To diagnose a car’s vacuum leak, listen for high-pitched hissing noises under the hood, check for engine error codes, or use a smoke machine to identify where the vacuum system might be compromised.
How Long Does Vacuum Leak Repair Take?
Vacuum leak repair can generally be completed within a few hours. The exact time depends on the leak’s severity and location. Simpler leaks can take as little as under an hour, while more complex issues may require more work.
What Tools Are Needed For Fixing Vacuum Leaks?
For fixing vacuum leaks, basic tools like a screwdriver, pliers, and a vacuum hose are typically required. A mechanic might also use a smoke machine for leak detection, and replacement parts such as gaskets or connectors may be necessary.
Conclusion
Addressing a vacuum leak promptly ensures your car maintains optimal performance. The repair time varies, generally taking between 1 to 4 hours. Trust a professional for accuracy and efficiency. Remember, quick action can prevent further engine issues. Drive safe, and keep your vehicle in top condition!